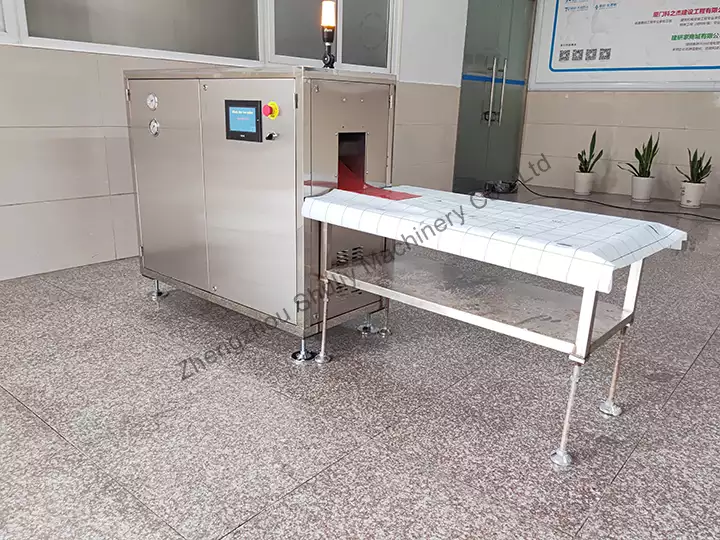
Vyombo vya habari vya kuzuia barafu kavu SL-120 ni kitengo cha ufanisi na cha kuaminika, na matumizi sahihi yanahakikisha uendeshaji imara na maisha ya huduma ya muda mrefu. Hebu tuone jinsi ya kutumia mashine hii kwa usahihi hapa chini.
Jifunze kuhusu ujenzi wake
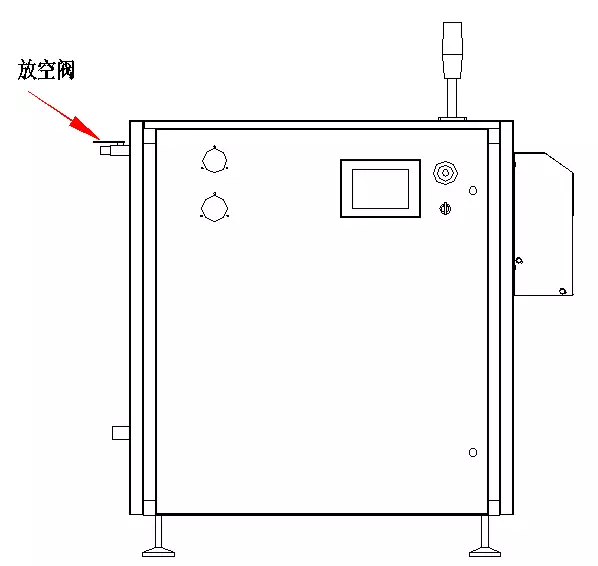
Kabla ya kuendesha mashine ya kutengeneza kete za barafu kavu, unahitaji kujua kila sehemu ya mashine inaundwaje, na jukumu lake ni lipi, hapa chini kuna muundo wa mchoro wa mashine ya barafu kavu kwa marejeleo na masomo yako:
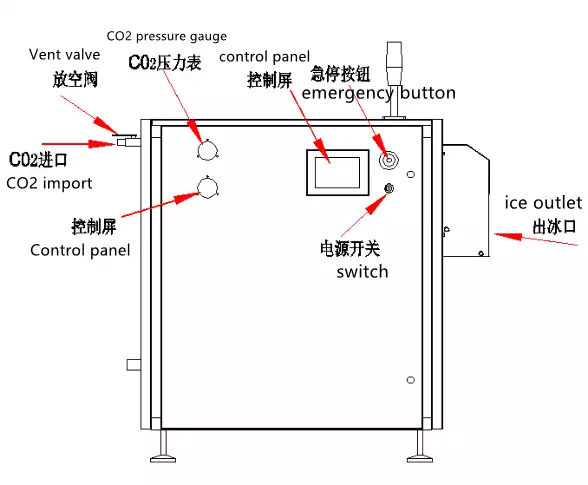
Maagizo ya uendeshaji wa mashine ya kuzuia barafu kavu ya SL-120
Kisha hebu tuone jinsi ya kutumia kwa usahihi vyombo vya habari vya kuzuia barafu kavu:
Hatua ya 1: Weka mashine
Weka vifaa kwenye eneo la uingizaji hewa (wazi madirisha na milango ya uingizaji hewa wakati wa kuzalisha barafu kavu); weka vifaa kwa usawa.
Hatua ya 2: Ongeza mafuta ya majimaji
Fungua mlango wa kushoto, na kuongeza mafuta ya majimaji (Na. 46) kwenye tank ya mafuta, kiwango cha mafuta ni karibu 70-80C kwenye kiwango cha kupima.
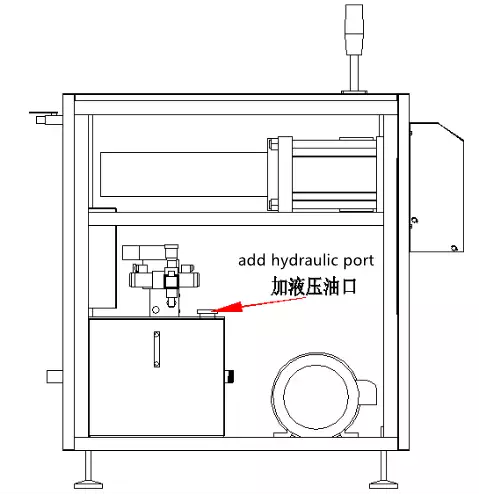
Hatua ya 3: Wiring
Unganisha kamba ya nguvu ya nje ya kifaa kwa awamu ya tatu ya waya 5 (380V/3P/50Hz), na kamba ya nguvu ina jumla ya waya 5 za msingi; waya hai: L1 (nyekundu), L2 (nyeusi), L3 (bluu), waya wa upande wowote (kijani), waya wa ardhini (njano).
Hatua ya 4: Shika mashine
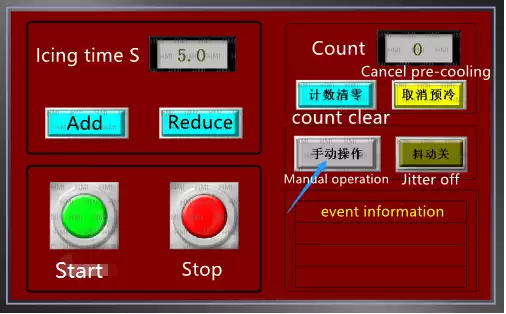
- Washa kubadili nguvu, ingiza skrini ya kugusa na ubofye INGIA;
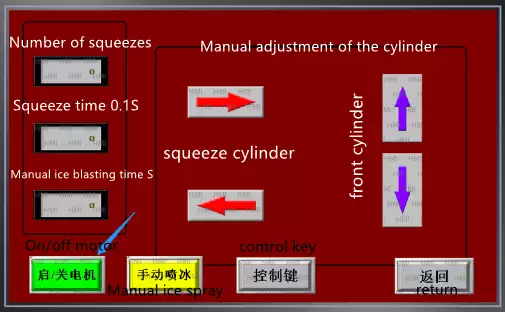
- Ingiza kiolesura cha operesheni ya nyumbani, bofya "Mwongozo" na "kifungo cha uendeshaji";
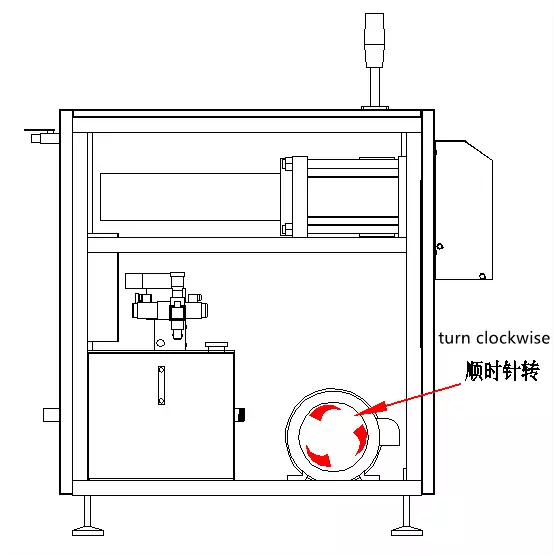
- Ingiza ukurasa wa mwongozo, na ubofye "Anzisha injini", baada ya injini kuanza, fungua mlango wa kushoto ili kuona ikiwa blade ya feni iliyo nyuma ya motor inazunguka saa.
Hatua ya 5: Unganisha na silinda ya gesi ya CO2
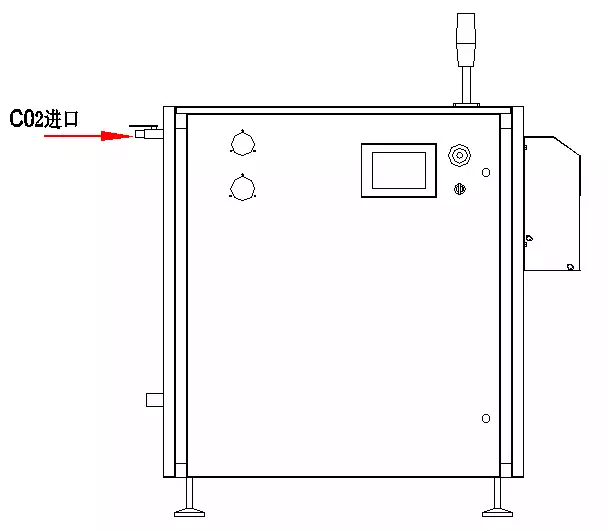
Unganisha mwisho mmoja wa mvukuto kwenye sehemu ya kioevu ya silinda ya gesi, na mwisho mwingine kwa nafasi ya kuingiza dioksidi kaboni ya vifaa.
Hatua ya 6: Anza uzalishaji wa vitalu vya barafu kavu
Ingiza skrini ya kugusa; bonyeza "kuanza kifungo"; kifaa huingia na kuanza kufanya kazi.
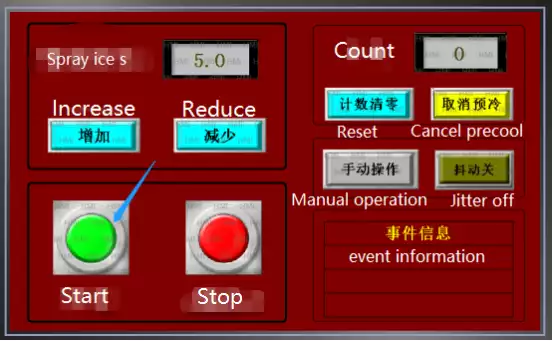
Hatua ya 7: Rekebisha vigezo vya kuzuia barafu kavu
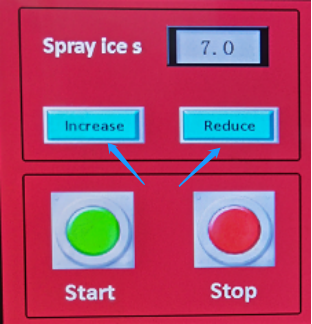
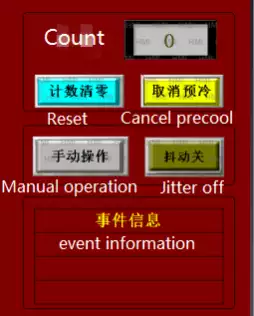
Rekebisha uzito wa kila kipande cha barafu kavu na wakati wa kunyunyizia barafu.
Hatua ya 8: Maliza kazi
Kwanza, funga valve kwenye silinda ya gesi ya nje; baada ya kuingia "kifungo cha karibu" kwenye skrini ya kugusa, kifaa kitaendesha mara mbili na kisha kuzima ugavi wa umeme.
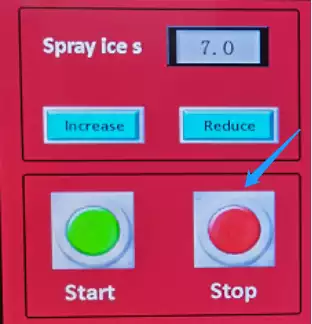

Fungua valve ya kutolea nje nyuma ya vifaa, kazi imekamilika.
